
This is a great method for relatively controlled results. No need for big batches and dye pots here, so this is favourable for small bits of fibre.
You can also dye batts, roving and spun yarn this way as well. It’s perfect!
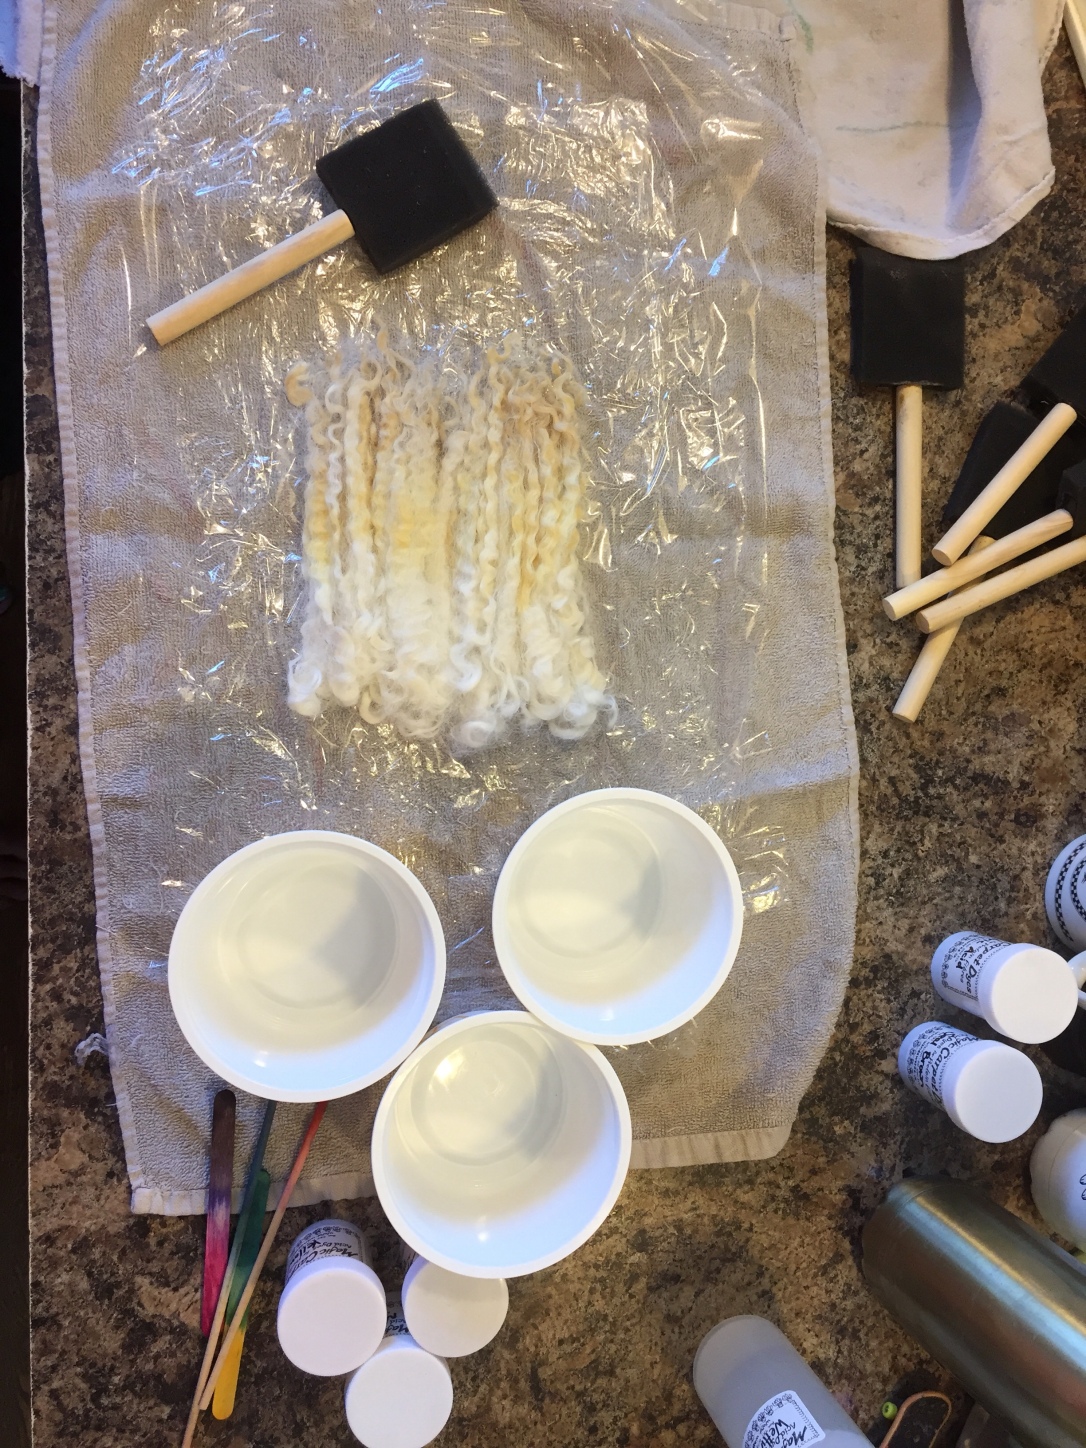
You will need:
Clean locks (wool, roving or yarn)
Acid dyes
A number of small containers, one for each colour
Foam brushes, one for each colour, though it is possible to wash out the brush between colours if you’re short on brushes
Citric acid or vinegar
Synthropol or shampoo
Plastic wrap
Small towel
First step is to soak your locks, or whatever it is you are choosing to dye in water along with some synthropol. You could also use a drop of shampoo, jet dry or dawn. I let mine soak for about thirty minutes. Lots of time to gather up dyeing supplies.

I used my usual acid dyes for this project, Majic Carpet Dyes, they always give me vibrant results. Whatever it is you use, follow the manufacturer’s instructions for mixing.
After the locks had a good soak, I removed them and rolled them in a small towel and gave them a squeeze to get most of the water out.
Next I laid out a large double layer of plastic wrap and set my locks down in the middle. Note that you might not want to start with a thick mass if you want consistent colour. If your pile of locks is too thick the top locks might be very bright and the ones on the bottom not so much. That said, it would be a nice effect if that’s what you want.
This is the time to add either vinegar or citric acid to your mixed colours.
Here comes the fun part, get creative!
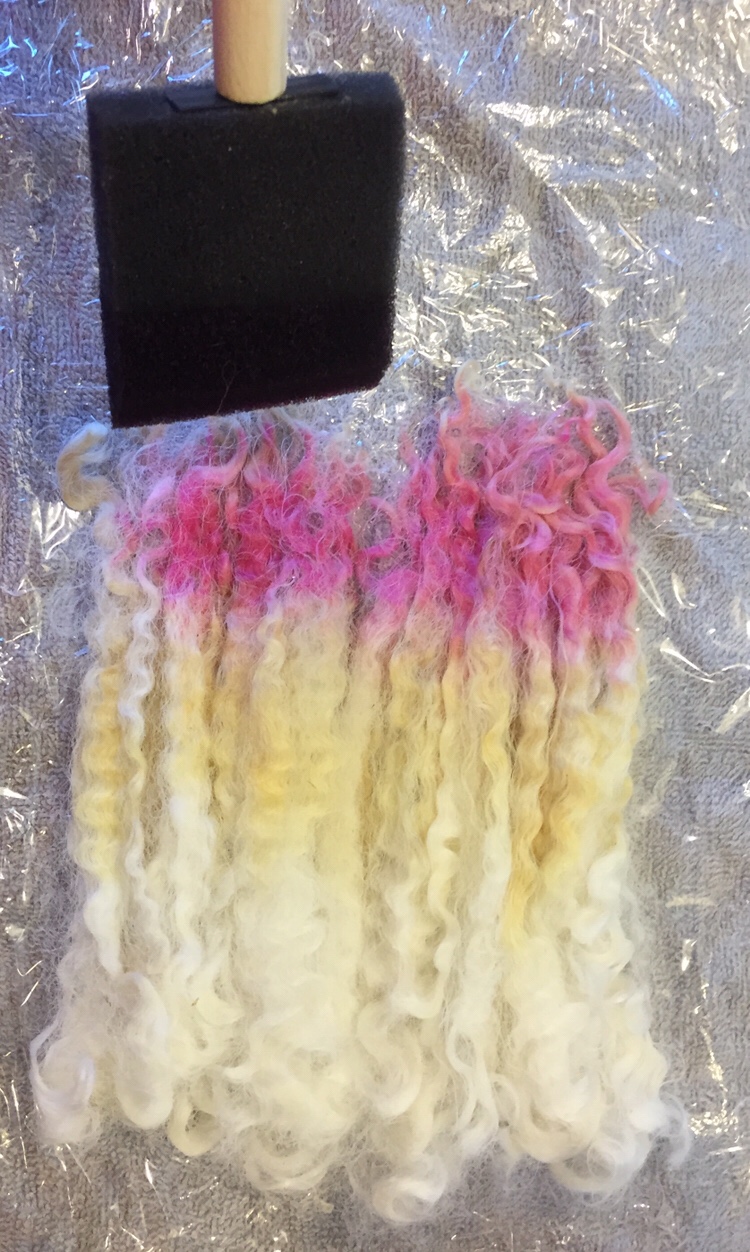
Dip the foam brush into the colour you want to start with, go easy, you don’t want your brush dripping everywhere. Start with just a bit of colour and it is very easy to add more, but you cannot take it off once it’s on. Press the brush to the locks and you’ll see them soaking up the colour.
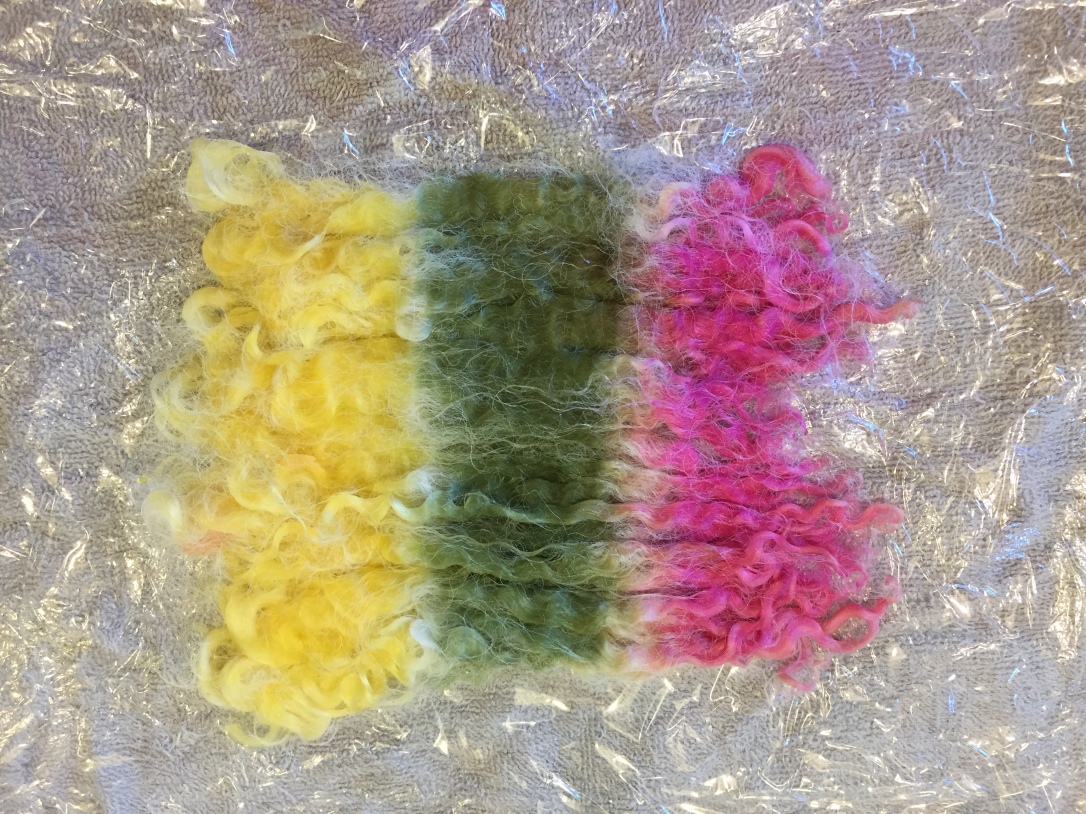
I left a small space between my colours so they wouldn’t bleed together. If you worked with colours that mix nicely, red next to yellow etc, it could turn out really nice.
Again, for this part there are really no rules, just a guideline how to method.
So once your locks are finished being painted, wrap them up in the plastic wrap. I wrapped two sides in, then the last two sides together and it created a handle to carry the packet by.

Place the little package in the microwave, either in a dish if you would like or right onto the turning plate which is what I chose to do.
Two to three minutes in the microwave is all it takes for a good steam to build up in the package and set the dye.
All microwaves are different. This is a hot project! Use extreme care when using your microwave and moving your hot lock package! Steam burns! Use oven mitts or other kitchen tools to safely move the hot package!
I began with two minutes set on my microwave. It seemed to look good and be going well. I heard some popping inside so I stopped the microwave to have a peek, all looked good so I let it continue. At the end of the two minutes, I set the microwave for an additional thirty seconds to be certain enough steam was in there to set the colour. You will see your package swell up while in the microwave.
Now to remove your package, it will be hot! Be careful! I used oven mitts, and carefully put my package on a towel on the counter. I let it sit for a few moments, then while still wearing my oven mitts I opened it up.

Once the locks were at a temperature safe to handle, put them into warm clean water to be certain the colour had set. Place them back into a towel, give them a good squeeze and ta-dah! Gorgeous painted locks!
I tried a few colour combinations, the possibilities are endless!

I am very happy with the results!
With my left over colours I dripped them onto a small pile of wool.

I went a bit over board, and the wool in the bottom of the package ended up quite muddy, but still interesting. This is how we learn! 
Here is the nice top, it really didn’t turn out too bad!
This is a fun quick method for dyeing. Perfect for felters who need a little of this colour, a little of that. A wonderful way to get controlled results.
I would like to note I was able to use the same plastic wrap to dye all the locks above, reuse too if you can!
Happy dyeing!

Thank you for these clear and step by step instructions. I think I can do this!
LikeLiked by 1 person